The most difficult part to find is plastic coated cable. Dogs will bite the loop, so plastic coax or similar is not strong enough. Some alternatives for sourcing the cable are cable based plastic covered clothes line, and long bicycle cable locks.
I was recently in Canada on business and found some 3/16” plastic coated aircraft cable at a Home Depot for 36 cents CND a foot.
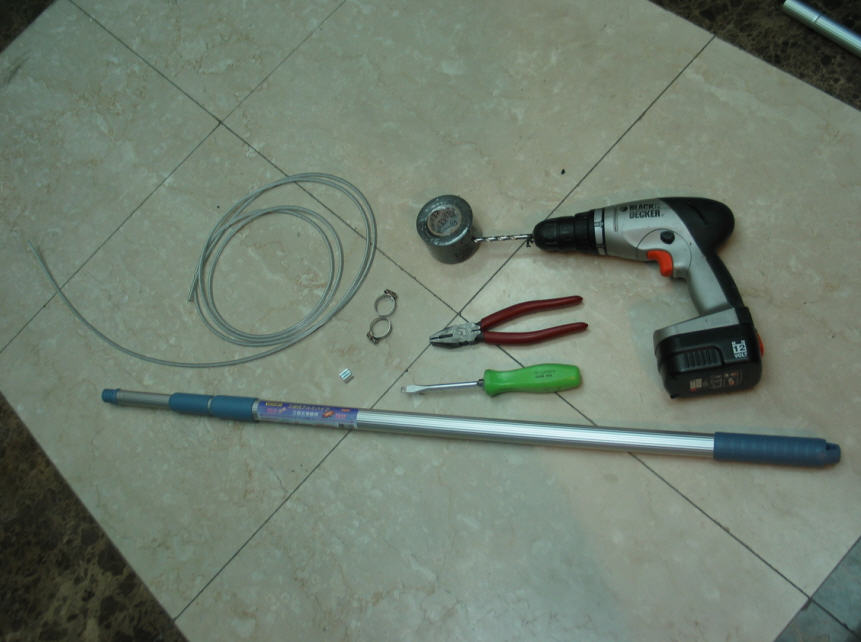
What you need: (prices quoted in Taiwan Dollars. 30nt = 1 USD)
- 1 standard extendable mop/broom utility pole ($85nt)
- 10ft plastic coated steel cable (approx 100nt)
- 2 Hose Clips ($35nt for 4)
- 2 Metal Squash type Cable clips/clamps (5 nt or so) or a few plastic cable ties.
- 1 Roll of Electrical Tape (10nt)
Tools:
- 1 Electric or hand drill
- 1 3/16” or ¼” drill bit (slightly bigger than the cable)
- 1 Pair of pliers
- 1 Screwdriver
- 1 Dog (for testing purposes)

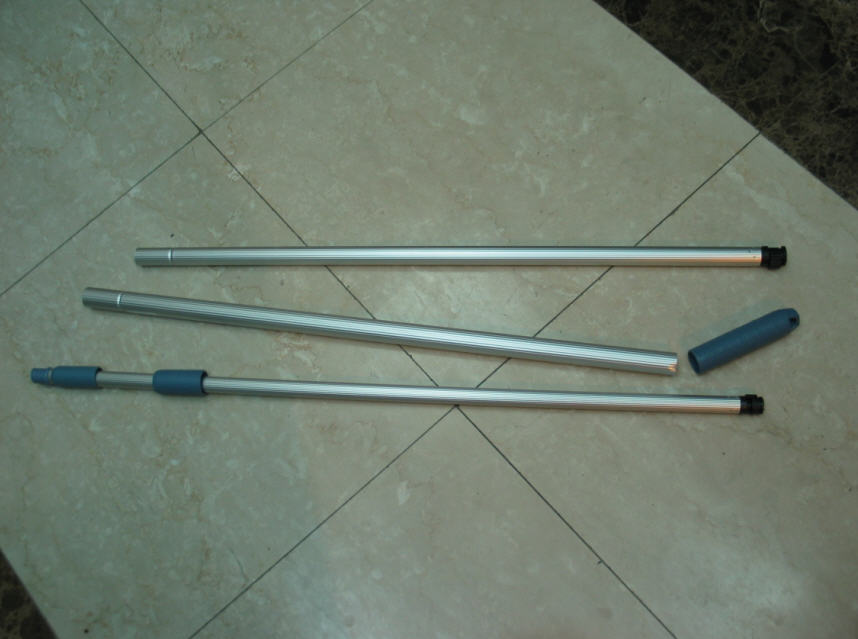
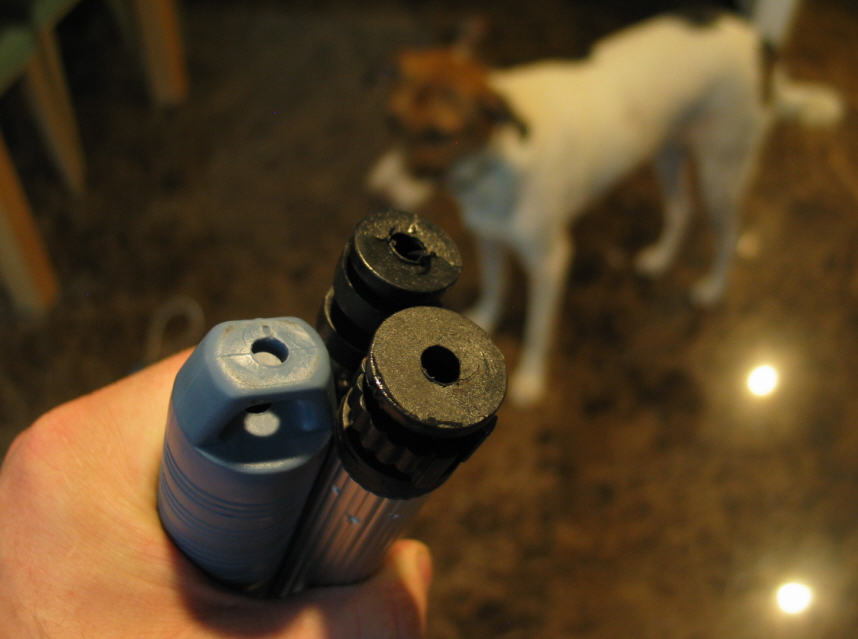
- Disassemble the pole enough to enable drilling of the locking mechanism. If it’s a 3-piece pole (as shown) the disassembly is a PITA and you have 2 mechanisms to drill thru. On the 3-piece poles, if you fully extend the pole and keep twisting the joint counter-clockwise while pulling really hard, the joint comes apart. Don’t twist clockwise as this will activate the lock and make it impossible. If it’s a 2-piece pole, then you’ll just need to take of the cap handle to do the drilling. Note: I choose 3-piece poles for the extra strength, and tape up the small extension, which is weak.

- Drill through the threaded end of the pole, the locking mechanisms and the end cap. Make sure the drill is perfectly aligned with the pole when drilling, especially for the locking mechanisms, which are quite thin where the drill penetrates.

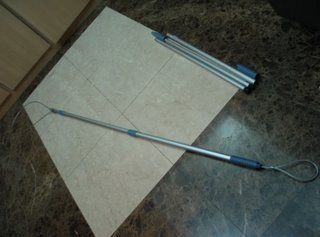
- Thread the cable through all the pieces before re-assembly. It can be tricky to get the cable through the last hole, which is usually the threaded end when I do it. Usually, some jiggling around gets it in the hole after a few attempts. Make sure there is enough cable out each end for the dog loop and the hand loop.
- Reassemble the pole. For a 3-piece pole, it’s a matter of forcing the joints back together by twisting. For a 2-piece pole, it’s just a matter of putting on the cap handle again.
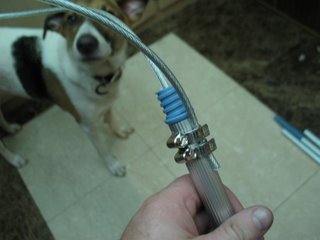
- Use the 2 hose clips to clamp the loose end of the cable as near to the thread end as possible. This will clamp onto the plastic end inside the tube for extra strength.
- Use the cable clips (or some plastic cable ties) to form a hand loop at the other end. This loop needs to be strong as once the pole is in use, this loop will support the full weight of the dogcatcher as he or she gets dragged along by a raging stray dog.
- Tidy up. Wrap the sharp edges of the hose clips with electrical tape. If you used plastic cable ties for the hand loop, it is worth wrapping these in tape also. When taping the hose clips, I also lock the small extension joint and tape it also, to prevent use and increase rigidity of the pole.

- Test. Extend the pole and lock the joints. There should be enough loop to fit over a dog’s head. To close the loop up it’s a matter of holding the pole with one hand an pulling the hand loop back. If the catching situation is hostile the pole itself can be let go and the dog can still be retained by holding onto the hand loop only. The Dog will naturally try to get away and the loop will tighten, giving the catcher time to regain control of the pole.


Guidlines about humane animal handling
Tomahawk Control Poles
Ketch-All animal control equipment
Alana Ecology Control Poles
