I thought I would put my money where my mouth is and have a go and making one based on something I thought up myself and as I so willingly suggested to a poster on forumosa.com who was looking for an iPod power pack.
The basic theory was to get a Car accessory -USB adaptor, and rip it to bits, combine it with some batteries and presto, have a power pack to charge an iPod away from any usual power source.
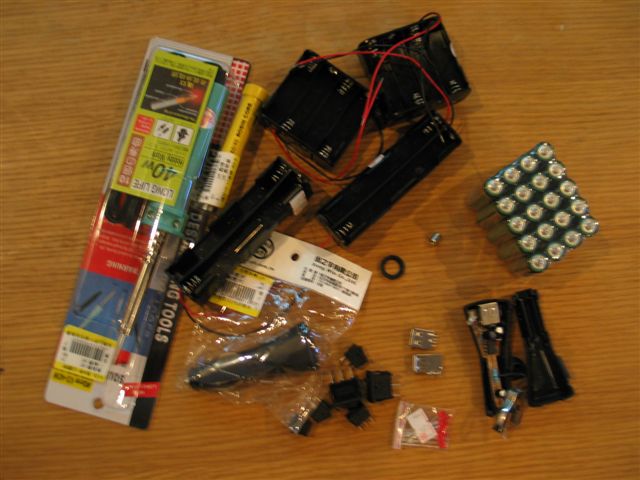
So I went to Guang Hua Computer Market today and picked up some bits. As you will see in the photo, I got carried away with various shaped battery holders and cases, and different switches, just to make sure I had all options covered. Here is a photo of everything that I bought, including a soldering iron (80nt - and that wasn't the cheapest!)
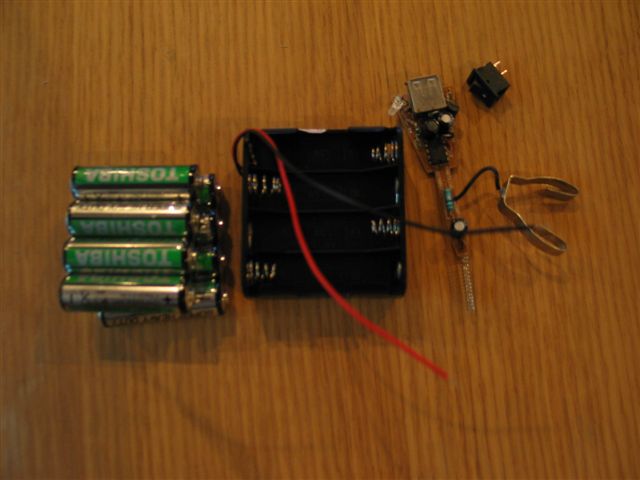
Here is a photo of the bare minimum bits you'd need based on a 12v DC input (8 x 1.5 AAs - but you will see I used a different configuration to this)
The final parts list (that I used) is as follows:
1 x Car Accessory-USB adaptor = 90nt
2 x 8AA battery holders = 40nt
1 x rocker switch = 12nt
16 x AA heavy duty batteries = 79nt
1 x Black plastic project case = 80nt
total price = 301nt (including batteries)
total price = 222nt (unit only) About $7 USD!!

First step was to take the Car Adaptor to bits. A blade screwdriver in the seam and it was in bits.
A small sticker on the adaptor stated:
Input: DC 12V-24V Output: DC 5.0V +- 5% Max: 500mA
Wha,wha....what? This handles 24V input? So, after thinking about this for 2 seconds, I figured 16 AAs would be better than 8. Will last longer. :)
After a bit of jiggling around I found that I had to use the 2 long battery holders instead of the 2 flat ones.
I had bought a new LED so I could have a power indicator,
 as I presumed the one on the adaptor would be in the wrong position. After some testing, I discovered the adaptor LED was a hi-tech 2 color unit that indicated green for 'ready' (input ok) and red for 'charging'. I desperately wanted to keep this feature, so I carefully bent the LED around so it would sit in a hole beside the USB slot in the case.
Next step was to cut the holes for the USB slot, LED and the rock switch.
I positioned these all at one end, using the space not occupied by the battery holders
I used a
 drill to make some holes which I finished off with a craft knife and needle file. That took the longest time, about an hour for a decent job.
Then it was just a matter of assembling the switch and USB unit, with attached LED into the case. Due to precision hole making, these were a nice push fit.
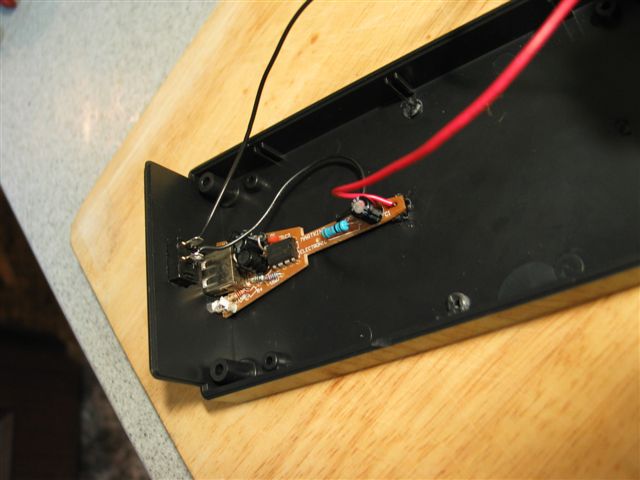
Then it was a matter of soldering the wires from the battery holders to each other (+tve to -tve) and one to the USB unit, one to the switch, and one between the switch and the USB unit.
I should mention at this point that some web research outlined that the center pin part of those adaptors is +tve.
I melted a bit of excess plastic with the soldering iron to anchor the other end of the USB unit to the case.
Some tape tidied the only wire-to-wire soldering and it was ready for business. I packed out the battery to case void with some polystyrene wedges to stop it all rattling around.
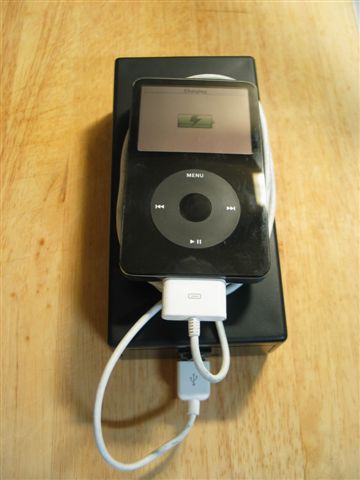
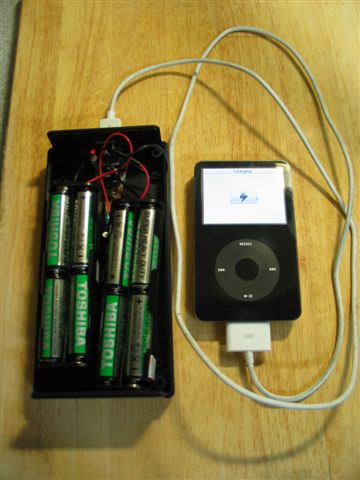
As you can see, it works a treat and it actually looks quite professional too...
The rest of the Photos show: Before the lid goes on.
With the lid on, charging iPod.Red LED indlicates charging.
The complete unit is a reasonable size, but with 24V on board, I am hoping it would be good for a few charges.
Conclusion:
220nt for a battery pack for any USB charged device is pretty cheap.
A couple of hours to make it, and I am not into electronics (no kidding, I had to even buy an iron).
Well worth the effort I reckon.
 If you were a real geek:
You could put in a external DC input, and a charging circuit. Then you could use rechargable batteries which would save money in the long run, but I figure I wont actually use this unit more than a few times a year MAX so I'll just stick with 80nt worth of once-use batteries.
Some things I'd like to know though....
What sort of safety features would be good to put in there
 (i.e. a fuse)?
How long will 24VDC for 16 x 1.5v AAs provide charge at 5VDC 500mA max?
What about heat?
Disclaimer: I just built this to see if it could be done, I haven't tested it in any way, so if you want to make one, do so bearing this in mind...
